| For the head we simply need to
change a few setting and select a different texture. 1: Change the body
type from Normal to Head. Do not be alarmed when the head looks weird as
we have not chosen the new texture yet.
2: Make sure it the other selections are still Male, Adult, Light, (Unless
you used different setting when importing the body texture) and Zombie for
the name.
3: Select the head cmx file we created with the CMX Builder from th drop
down list. (C700MA_Zombie)
4: Now click the "Choose *.bmp File" button.
5: Navigate to the MaleMonster folder.
6: Select the "c_m1mnst.bmp" file and click Open. This is the
head image used for this head.
Your window should look like this now.
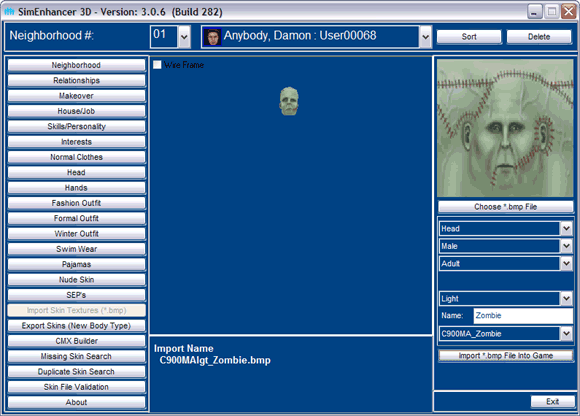
8: Verify the following:
The flat image above the Choose *.bmp File button has the right image.
The "Import *.bmp File into the Game" button is enabled.
The import Name matches that is below the 3D View.
C - Head
900 - The series number
M - Male
A - Adult
lgt - Light skin tone (or med or drk)
_Zombie - the name after
the underscore.
9: If everything looks right then click the "Import *.bmp File into
the Game" button.
10: Double check the names and click OK.
11: Click No when it asks you about deleting the original file. (This
is optional however you will want to keep it if you are importing to other
skin tones)
12: If you are importing it to other tones then simply change the skin
tone and repeat the last three steps again.
Click Next below to finish up
|