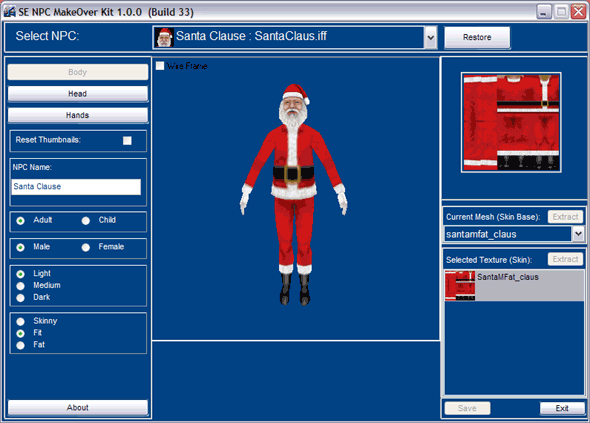
Choose from the list below to see details for each of the features listed. Those
of you that have used SimEnhancer 3D will find most of this program works in a very
similar manner.
Select NPC (Non Playable Character)
Use this drop down list to select from any NPC Characters available in your game.
Note this does not include Townies, Tourists, Somebody's, Etc. which are actually
playable once they have moved in with a family. To change these types of characters
which have many more options for editing you can use SimEnhancer 3D.
Restore (NPC)
If a NPC has been changed and then saved the SE NPC MakeOver Kit will extract a
copy from the game files to save the changes to. This copy is used instead of the
game default when it exists. To restore the game to the original NPC click the restore
button. This will then remove the modified copy and then load the default data for
that NPC back into the SE NPC MakeOver Kit for editing.
3D Viewport The 3D Viewport is visible most of the time. It is used for making character
changes and for most of the functions used for working with skins.
The following interactions with the Viewport are available:
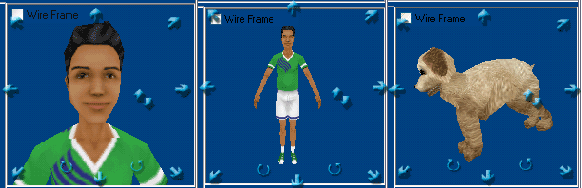
- Wire Frame. (Allows you to view the underlying 3D wire frame)
- Left Click and Drag. (Rotate, twist or Roll the character to any angle,
center is at the pelvis)
- Right Click and Drag (Zooms in and Out)
- Hold CTRL Key and Left Click and Drag (Pan around to get a closer view of each
part)
Body, Head, & Hands Buttons
These are for selecting which portion of the character you wish to change. When
you select each the Current Mesh and Selected Texture lists will display skins that
are specifically for that body part. Hands will display a set available hands to
choose from in the upper right corner. The exception is that it will also display
the default skins assigned to the character when it has not been modified. (I.E.
If the restore button is not enabled)
Reset Thumbnails
This box basically just tells the program to assign new thumbnails to the NPC when
it is saved. In some cases this will not be available if the program has determined
new thumbnails need to be assigned. (I.E. If the head is changed) This is not the
same as SimEnhancer 3D which normally just removes the thumbnails. The game does
not add new thumbnails into NPC files and therefore they need to be replaced in
order to keep it from displaying a black box or the old unchanged NPC thumbnails.
These thumbnails will not look identical to those that the game would generate if
it replaced them in NPC Characters. Please do not email me concerning this since
most people would rather see a reasonable likeness than to see one that looks like
someone else or that is just a blank box.
NPC Name
Allows changes to the Name that is displayed for the NPC during game play.
Age Selection
This will not be available for Pet NPC's. For others it allows you to select either
adult or child for the NPC. Keep in mind that the game often has specific animations
that are used by NPC's that may look odd if the NPC is not the same age as intended.
For instance an child mail person my appear to put the mail under the mail box rather
than in it. (I haven't tested it, this is just an example of possible odd looking
behavior)
Gender Selection
Allows you to select from male or female skins for your NPC. This has considerably
less effect in the game than SimEnhancer 3D. Most NPC's will use the same set of
Animation no matter what gender is specified whereas normal characters have many
animations specific to the gender. For example relieving their bladder. For the
most part this just determines what set of skins are available in the CMX and Texture
lists.
Skin Tone Selection
This basically just changes the set of skins available in the CMX and Texture
lists dependent upon the skin tone selected. Skin Tone does not have any effect
during game play for any characters with the exception of the skins available when
changing outfits which is not an option for NPC's.
Body Size Selection
This is the same as Skin Tone above except that it will be dependant upon the body
size selected.
Texture (*.bmp) View
This displays a flat unmapped view of the texture currently selected in the Selected
Texture list.
Current Mesh Selection
This displays a list of skins that are used by normal characters in the game. The
skins displayed will be dependant upon what selections are made in the left panel.
Custom *.cmx files can be add to this list from any known valid skin location by
right clicking the drop down box and selecting "Browse for Custom File".
Extract (Current Mesh)
This button allows you to extract a copy of the default skins used by the NPC. (Available
only if the NPC has not been previously edited and if there is not already a *.cmx
in any skin path with the same name) This will include the *.cmx file, any *.skn
files listed in the *.cmx, and any *.bmp file listed in the *.skn files. These can
be placed in any folder for editing. I suggest adding a sub-folder to the skins
directory for this. Extracting them can be useful to either edit them without editing
the NPC itself (If the edited skins are placed in the skins folder the game will
use them as the defaults fo the character), or they can be modified for use in your
game by normal characters. (See the tutorials for a tutorial explaining how to do
this)
Texture Selection
This displays a list of textures that have names matching the cmx selected in the
Current CMX list
Custom *.bmp files can be add to this list from any known valid skin location by
right clicking the drop down box and selecting "Browse for Custom File".
Extract (Current Texture)
This allows you to extract the default texture used by the selected NPC. (Available
only if the NPC has not been previously edited and if there is not already a *.bmp
in any skin path with the same name) This can then be placed in any folder for editing.
I suggest adding a sub-folder to the skins directory for this. Extracting them can
be useful to either edit the texture without editing the NPC itself (If the edited
skins are placed in the skins folder the game will use them as the defaults fo the
character), or they can be modified for use in your game by normal characters. (See
the tutorials for a tutorial explaining how to do this) This can be used in
combination with using the CMX Extract button (although the CMX extraction will
usually extract the texture anyway since it is usually listed in a *.skn file) or
seperately if you only want to change the graphics and not the shape for a particular
NPC.
Save/Exit
Save saves any pending modifications to NPC's and leaves the program open for further
editing. Exit will give you an opportunity to save pending changes if any and then
exits. When changes are saved to a NPC a copy of the NPC is extracted in the folder
where the NPC originated. For instance if it is found in ExpansionPack\ExpansionPack.far
then a copy will be saved in the ExpansionPack folder. I suggest deleting any modified
NPC's either directly or by using the Restore button before you install a new expansion
pack. Then go back and edit them again since there may be subtle changes to them
any time a new expansion is released.
Additional notes:
SE NPC MakeOver Kit requires a Video card with hardware acceleration and that supports
OpenGL. Most PC's and Video Cards sold within the past few years should fall into
this category. Chances are if you are playing the game without problems then you
should not have any problems running SE NPC MakeOver Kit. If you are worried about
it being compatible please download the trial and check it before purchasing.
Functions available will depend upon what expansion packs are installed.
SE NPC MakeOver Kit will provide the best representation of what the characters
will look like in the game if your display settings are set to 16 Million Colors.
(16 Bit)
|